
TOOLS & ANIMATIONS
Keyboard Shortcuts in Google Presentations
If you’re faster on your keyboard than your mouse, keyboard shortcuts can help you save time. With these, you can complete actions using only your keyboard. Here’s a list of actions you can do using your keyboard
Add Transitions to a Slide
Animations are helpful ways to make your slides look more dynamic. They’re also a great way to reveal text or objects on a slide one step at a time. For example, you could have five bullet points of text, and reveal them one-by-one on the slide with each click.
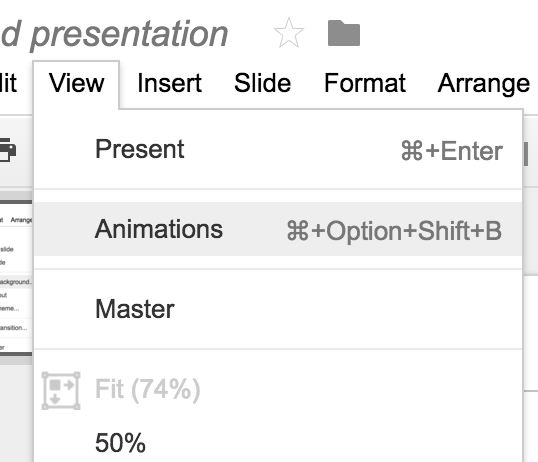
You can also make moving from one slide to the next a little more interesting with transitions. You can add or modify slide transitions and animations in the Animations pane. Here’s how to enable the Animations pane:
You can also make moving from one slide to the next a little more interesting with transitions. You can add or modify slide transitions and animations in the Animations pane. Here’s how to enable the Animations pane:
- Go to the View menu and select Animations
- Select an object on a slide, then go to the Insert menu and select Animations
- Choose the animation for that object
|
|
|
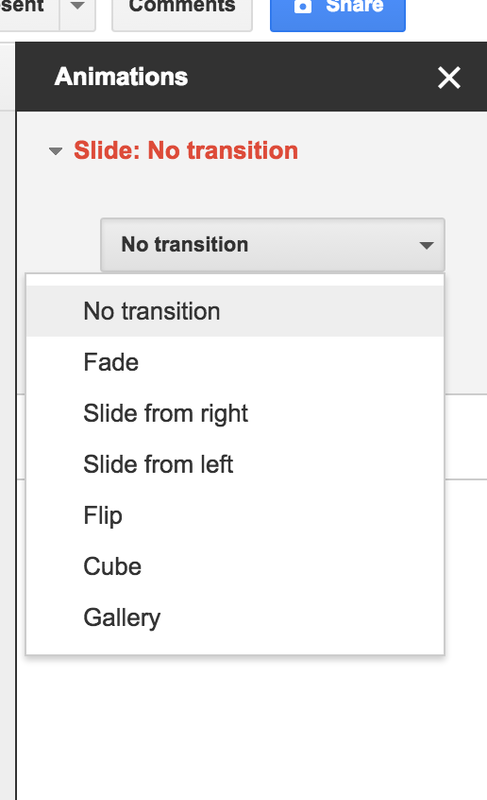
After selecting a transition, you’ll need to set the speed of the transition
After you’ve selected the transition type and the speed of the transition, you’ll have the option to apply this transition to all slides in the presentation.
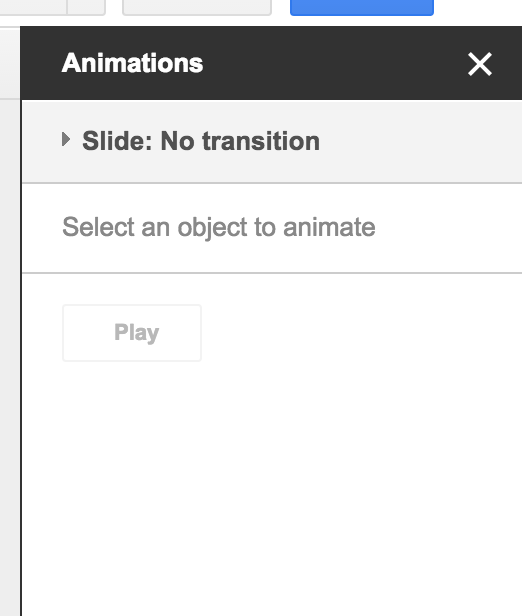
If you At the bottom, you can apply animations to text and objects.
Here are the options available in the Animations pane:
You can add as many animations to a slide as you’d like, with one animation per shape. To add an animation to a shape, click+Add animation in the Animations pane when that shape is selected, or right click the shape and select Animate.
The list of animations in the Animations pane is displayed the order in which animations will take place on the slide. Once an animation is listed in the Animations pane, you can drag an animation up or down to change the order in which shapes appear or disappear on the screen.
To delete animations from a shape, click Delete next to that animation entry.
To test a series of animations on a slide, click the Play button or click Present
After you’ve selected the transition type and the speed of the transition, you’ll have the option to apply this transition to all slides in the presentation.
If you At the bottom, you can apply animations to text and objects.
Here are the options available in the Animations pane:
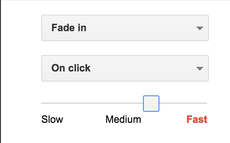
- Open the Appear drop-down menu to choose how you’d like a selected shape to appear.
- Click the On click menu to set the timing for the shape’s animation.
- Adjust the speed of each shape’s animation by selecting a speed along the Slow, Medium or Fast spectrum.
You can add as many animations to a slide as you’d like, with one animation per shape. To add an animation to a shape, click+Add animation in the Animations pane when that shape is selected, or right click the shape and select Animate.
The list of animations in the Animations pane is displayed the order in which animations will take place on the slide. Once an animation is listed in the Animations pane, you can drag an animation up or down to change the order in which shapes appear or disappear on the screen.
To delete animations from a shape, click Delete next to that animation entry.
To test a series of animations on a slide, click the Play button or click Present
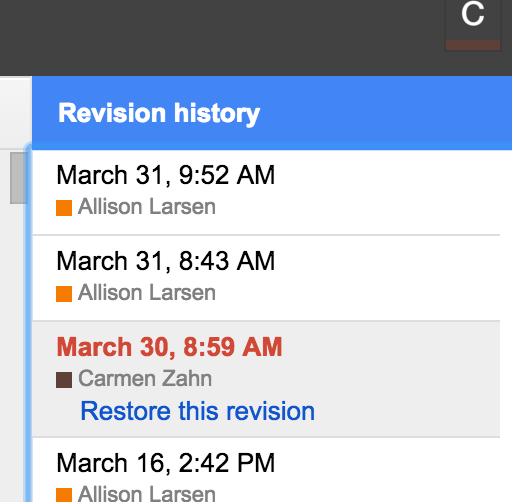
Revision History
Google has a revision history pane that allows you to view at a glance all changes made to a document by each collaborator. While it may not work exactly like a track changes tool, Google Docs revision history lets you view and revert to earlier versions of your file, and see which collaborators made edits to each of these versions.
To access revision history in Google documents, presentations, drawings, and spreadsheets, follow these steps:
To access revision history in Google documents, presentations, drawings, and spreadsheets, follow these steps:
- Select File > See revision history.
- Click a time stamp in the right pane to see a previous version of the document, edited by the collaborators listed below the time stamp. Any changes made by a particular collaborator will be shown in the body of the document in the color assigned to that individual in the revision history pane.
- If you'd like to revert to the version you're currently viewing, click Restore this revision.
- Note: Restoring your document to a previous version does not eliminate any versions of your document. Rather this version moves to the top of your revision history, maintaining all previous versions of your document, including the current version.
- If you'd like to return to the the current version of your document to continue editing, click the X in the upper right of the 'Document History' pane.

|

|
|
Zoom In and Out of Slides
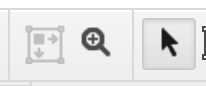
You can go to the View menu and select a zoom level, such as 50%, 100% or 200%. Alternatively, you can use the magnifying glass icon in the toolbar to zoom in.
To zoom back out to a slide size that fits your screen, you can select the Zoom to fit icon to the left of the magnifying glass.
To zoom back out to a slide size that fits your screen, you can select the Zoom to fit icon to the left of the magnifying glass.
